How to import Demo layouts
Download and unzip file
Download the layout zip file, and then extract it to the .json files.
Import unzipped file to Divi library
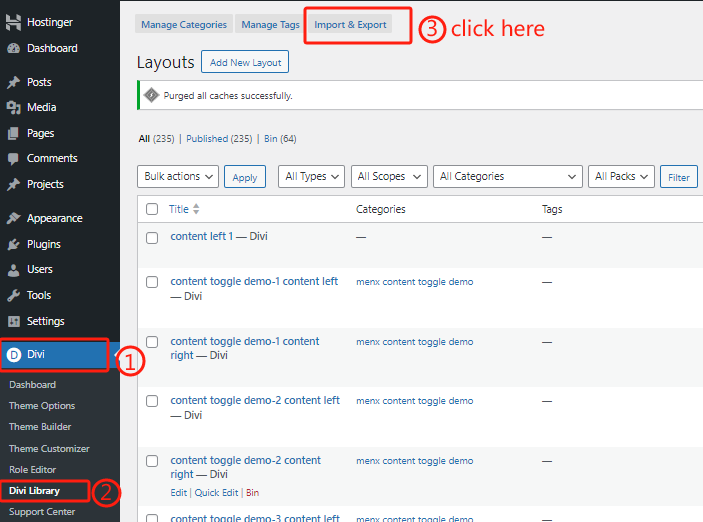
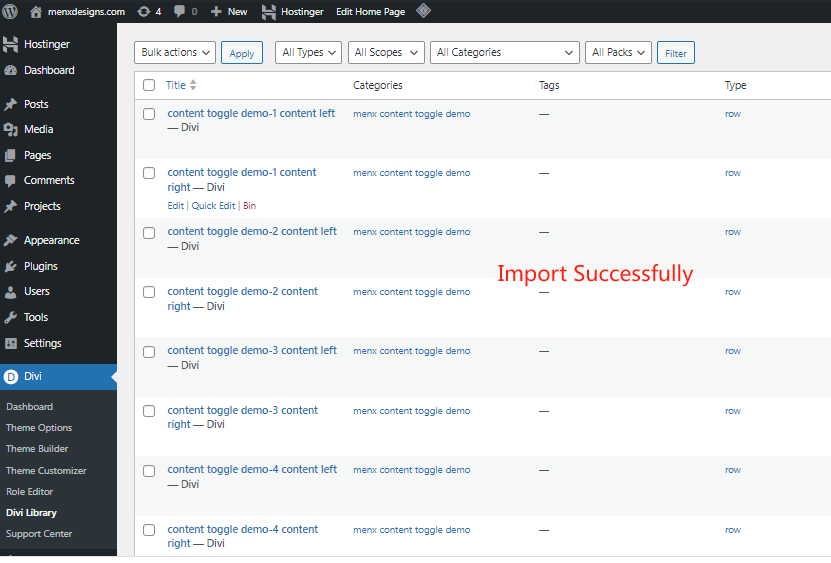
Go to the WordPress dashboard >> Divi >> Divi library, click “Import & Export”.
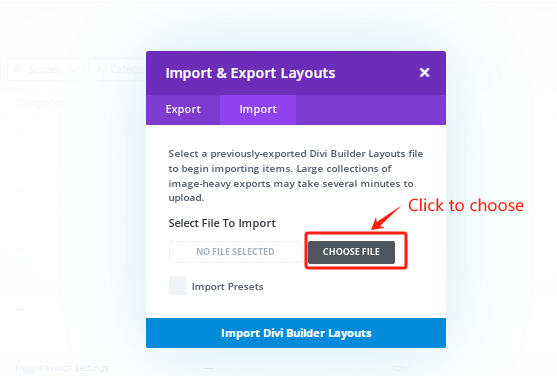
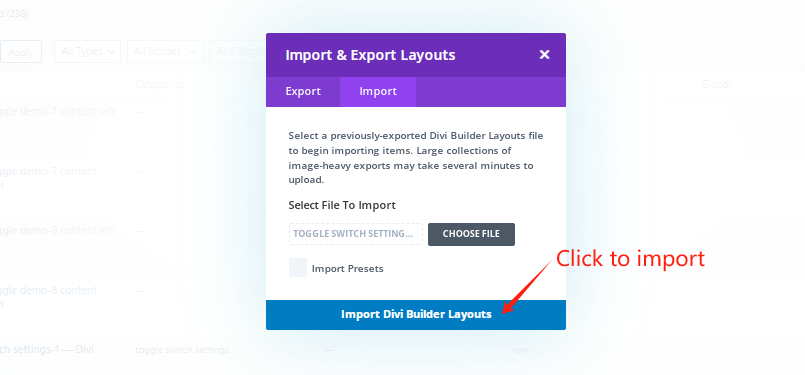
Then select the ‘Import’ tab and click ‘Choose File ‘ to select the unzipped json files, and finally click ‘Import’.
How to add layouts on your site
Enable Visual Builder
Click “Enable Visual Builder” to edit the layouts in visual view.
Find out the layout type
Go to the WordPress dashboard >> Divi >> Divi library. Check the “Type Field” of the imported layout to find out what type it is: a section, row, or module layout.
Type is Section:
If the layout type field you are importing is Section, please go to If Type Field is Section Layout.
Type is Row:
If the layout type field you are importing is Row, please go to If Type Field is Row Layout
Type is Module:
If the layout type field you are importing is Module, please go to If Type Field is Module Layout
If Type Field is Section Layout
If the layout type field you are importing is Section, follow these steps:
Step1 : You can create a new page or modify an existing page, and then click the blue plus button to add a new section.
Step2 : Select “Add From Library” when insert Section.
Step3 : Insert Section window will show all the layouts that you have previously imported to your library. You can choose and click the section you want.
Step4 :Click “Use This Section” to import and use this section on your site.
Ok! You can edit or use it on your site!
If Type Field is Row Layout
If the layout type field you are importing is Row, follow these steps:
Step 1: You can create a new page or modify an existing page, and then click the blue plus button to add a new section.
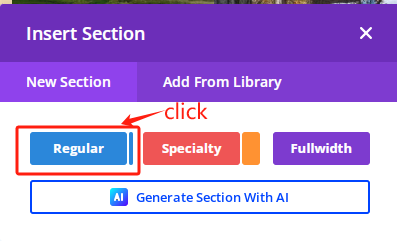
Step 2: Select “Regular” when insert Section.
Step 3: Select green plus button to add new row.
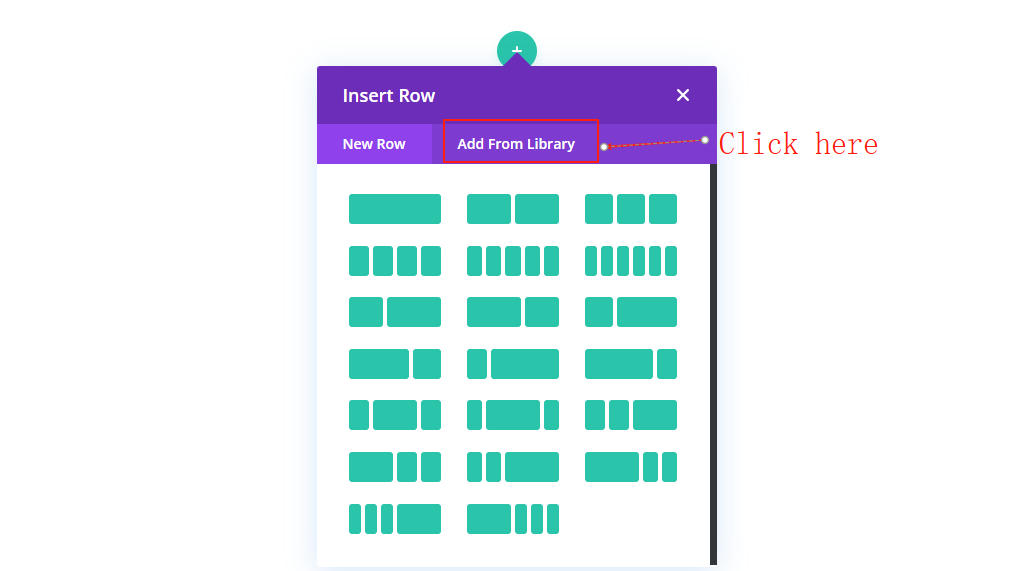
Step 4: Select “Add From Library” to choose the imported layout you want to use when insert Row.
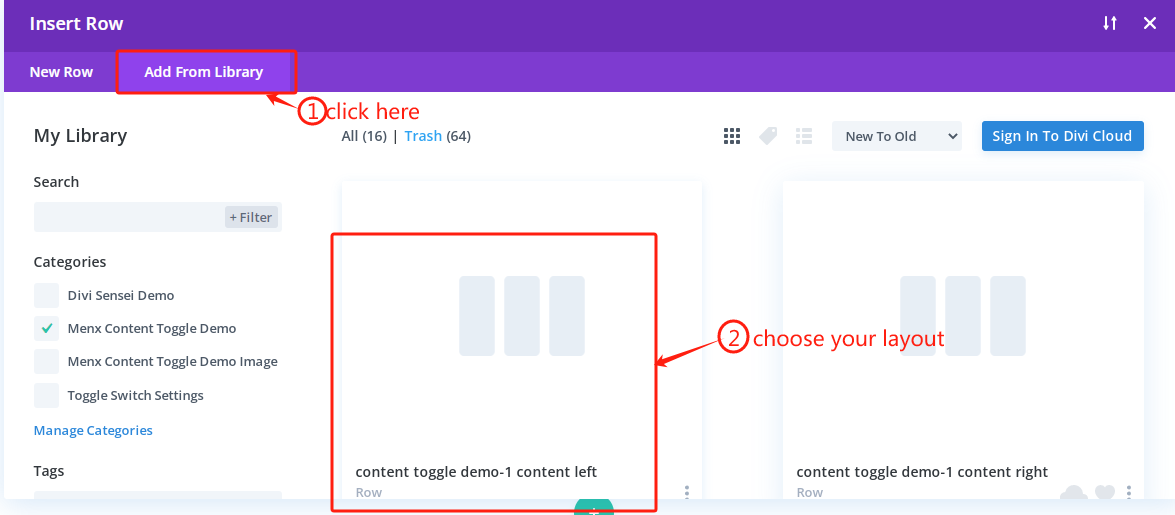
Step 5: “Insert Row” window will show all the layouts that you have previously imported to your library. You can choose and click the layout you want to edit.
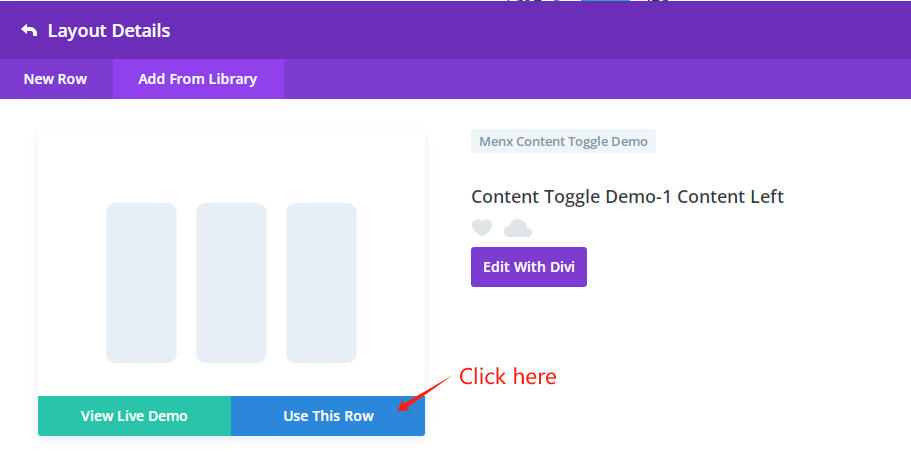
Step 6: Click “Use This Row” to import and use this row on your site.
Ok! You can edit it on your site!
If Type Field is Module Layout
If the layout type field you are importing is Module, follow these steps:
Step 1: You can create a new page or modify an existing page, and then click the blue plus button to add a new section. Select “Regular” when insert Section.
Step 2: Click the green plus button to add a new row. Select “Regular” when insert Row.
Step 3: Click the black plus button to add a new module.
Step 4: Select “Add From Library” to choose the imported layout you want to use when insert Module.
Step 5: “Insert Module” window will show all the layouts that you have previously imported to your library. You can choose and click the layout you want to edit.
Step 6: Click “Use This Module” to import and use this module on your site.
Ok! You can edit it on your site!
How to edit and save layouts
How to edit the layouts
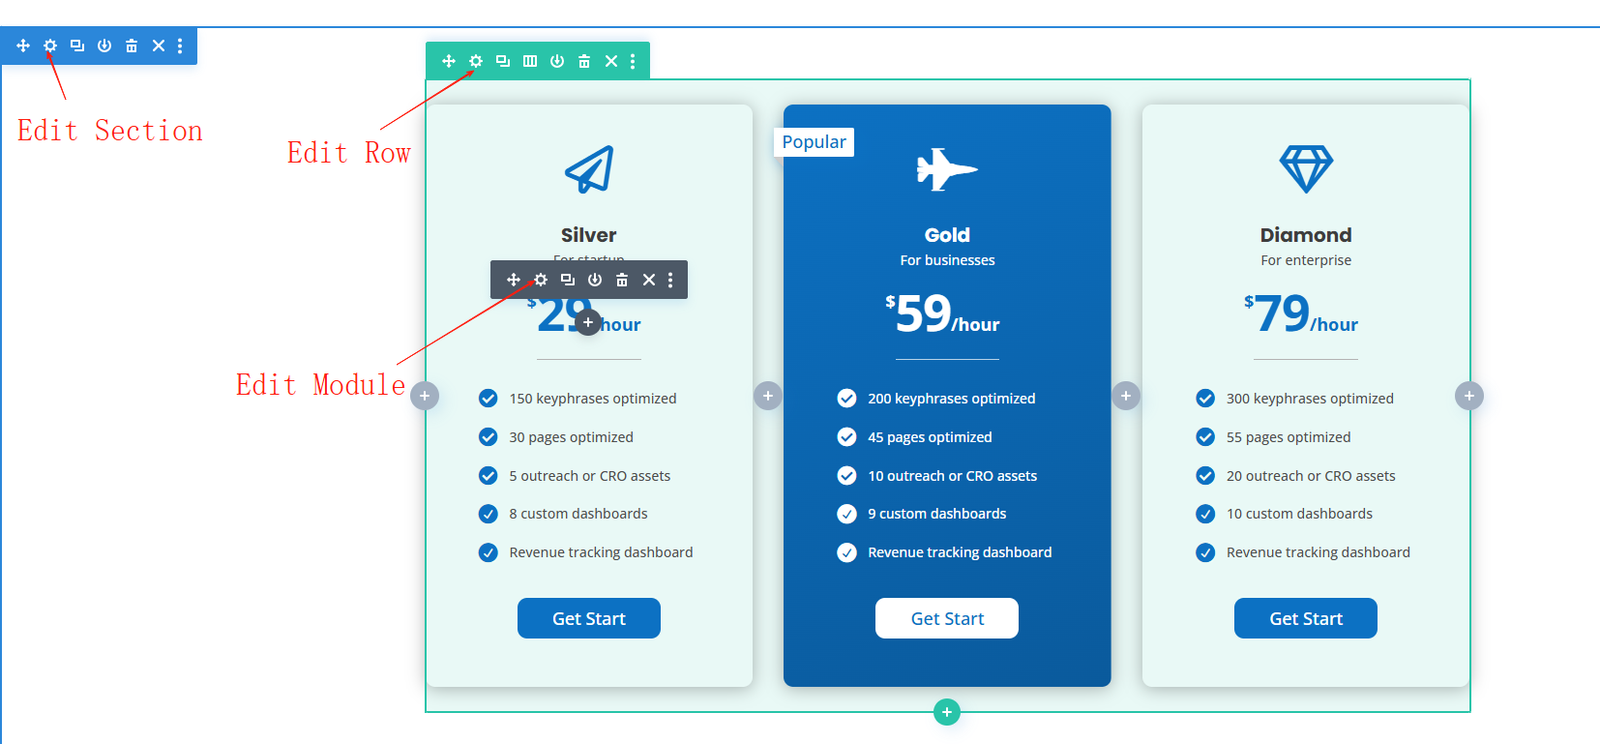
Select “Section Settings” to edit the section.
Select “Row Settings” to edit the row.
Select “Module Settings” to edit the module.
If you cannot accurately select the module you want to modify, enter the Wireframe View to modify it.
Go to Wireframe View
First, click the navy-blue button at the bottom.
Then click “Wireframe View” button at the bottom left.
In Wireframe View, you can click the Settings of the Section, Row and Module, even Code Module which you want to edit.
How to Save and rename the layouts
Type is Section:
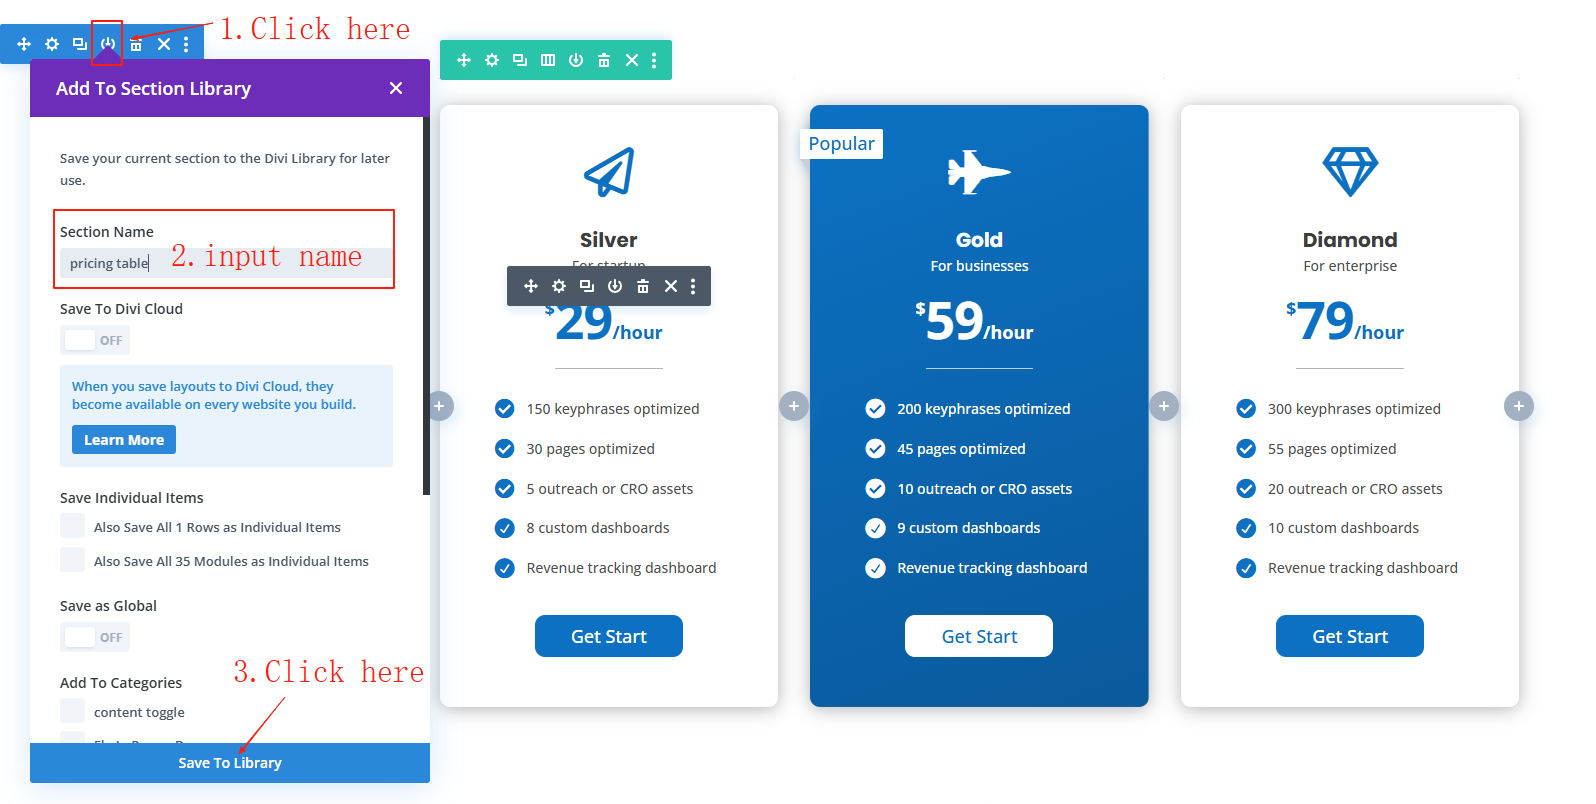
If the layout type field you are importing is Section, select “Add To Section Library” and then input the name you want to change for the edited layout. Finally, click “Save To Library” to save it to the Divi Library.
Type is Row:
If the layout type field you are importing is Row, select “Add To Row Library” and then input the name you want to change for the edited layout. Finally, click “Save To Library” to save it to the Divi Library.
Type is Module:
If the layout type field you are importing is Module, select “Add To ModuleLibrary” and then input the name you want to change for the edited layout. Finally, click “Save To Library” to save it to the Divi Library.
